How to Paint a Bathroom?

For most DIYers, painting a family room or bedroom is a common endeavor. You can maximize your payout with the least amount of work. However, painting the bathroom differs slightly from painting other rooms in the house. If you are wondering how to paint a bathroom, keep reading.
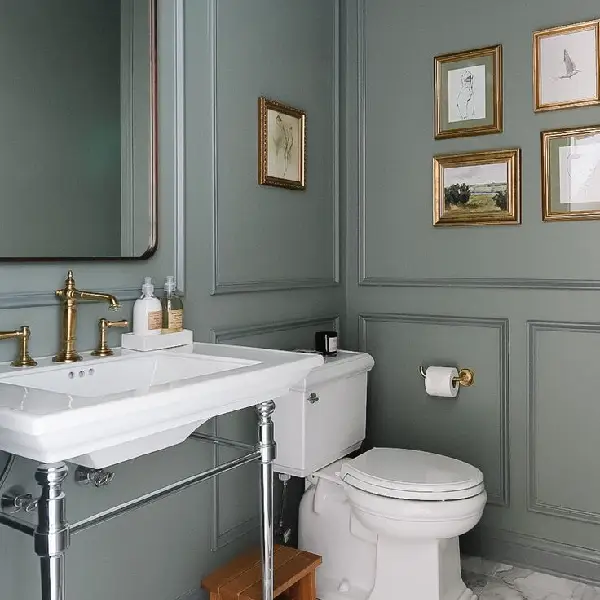
image sourced from here
Bathrooms are compact spaces that are often used, brimming with water from several sources.
It is crucial to give careful consideration to every facet of bathroom painting, from surface preparation and color selection to painting techniques and finishing touches, in order to achieve stunning results.
Many people wonder how long it takes to paint a bathroom. If this is your question too, we must say the average painting time for the bathroom is 4 to 6 hours.
There is also another frequent question about painting bathroom walls preparation: How long does it take to paint a small bathroom? To answer it, we should say it takes around 3 to 5 hours to paint a small bathroom.
Before walking you through the crucial steps of “how to paint a bathroom” let’s answer two important questions about painting bathroom wall preparation.
Is it OK to Paint the Bathroom?
Of course! Now let's talk about painting a bathroom.
First, it's crucial to use the right kind of paint. Because bathrooms are often humid spaces, you'll need to choose a paint that is made especially for bathroom use. This kind of paint will not fade or absorb moisture.

image sourced from here
Second, before you begin painting, you must prepare the wall's surface. This might entail sanding the walls to a smooth surface, fixing any damage, and removing any outdated paint.
Lastly, you'll need to use a cautious and even application of paint. This will make it more likely that the paintwork will appear good and endure a long period.
There is another question before we answer how to paint a bathroom, and it is: do we have to buy special paint to paint bathroom walls?
How to Paint a Bathroom with Special Paint?
Before wondering about how to paint a bathroom, you should decide on the type of paint you want to choose.

image sourced from here
Your choice of paint for your bathroom will rely on several things, such as your personal preferences, the surface you're painting, and the amount of moisture and humidity in the space.
The paint you choose in high-moisture locations, such as the bathtub or shower, needs to be made especially resistant to water damage. Usually, the labels for these paints say "waterproof" or "moisture-resistant".
You can use latex, acrylic, or oil-based paints, among other paint kinds, on walls and ceilings.
Oil-based paints are more resilient to deterioration and longer-lasting than latex and acrylic, which are water-based and simple to clean.
Consider the bathroom's size and lighting when selecting a paint color. Dark hues can provide the impression of intimacy, while light colors might elongate a tiny bathroom. You can experiment with bolder colors if your room receives a lot of natural light.
For more information about choosing a paint color for the bathroom, click here.
Now let's see how to paint a bathroom in a detailed, step-by-step guide.
How to Paint a Bathroom?; step by step guide
Keep reading to walk you through the detailed steps of “how to paint bathroom tiles”.
1. Preparing your bathroom
Select a satin or semi-gloss paint that won't mildew. Bathroom paint is subjected to a lot of wear and tear, so choose a product that is easy to maintain and repels water.

image sourced from here
Select a glossy or semi-gloss paint for your bathroom as these finishes are more enduring and simpler to maintain than matte or flat ones.
The main drawback is that they draw attention to flaws, therefore priming surfaces before painting is crucial.
Choose a hue that goes well with the adjacent room or corridor to the restroom. In smaller rooms, lighter hues are typically a better option.
Remember that brighter colors look due to the fact that glossier surfaces reflect more light.
2. Remove all hangings
Take off the electrical covers, bathroom items, and wall hangings. Any wall art, bookcases, draperies, and towel racks that can obstruct your paintwork should be removed.

image sourced from here
To ensure you don't lose them, unscrew the covers on wall switches and electrical outlets, then screw them back on.
Disconnect the handles and other hardware from any cabinets or sink vanities that you plan to paint as well.
3. Take out the toilet
If there's no room for a roller or paintbrush behind the toilet, remove it. You may easily get a thin sponge stick that is specifically made to paint and clean behind a toilet if there is any gap between the toilet and the wall. Look for one at a home improvement store or online.

image sourced from here
If not, shut off the water supply, flush the toilet to empty its contents, and start the removal process.
Loosen the nuts holding the tank's mounting bolts to the bowl if they can be removed. Remove the floor bolts from the bowl's base and remove them out of the way if they continue to obstruct the wall.
4. Clean the walls and trim
To extend the life of your paintwork, clean the walls and trim. If you wonder how to paint a bathroom to have a long-life paintwork, clean the walls and trim.
Use a solution of one part bleach to three parts warm water to clean the walls since the paint will not stick to surfaces that are coated with dirt, dust, or mildew.

image sourced from here
Wipe all surfaces you intend to paint after soaking a sponge or lightly abrasive pad in the solution and wringing it out.
Even though it could seem labor-intensive, you wouldn't want your freshly painted walls to begin flaking after a few months.
5. Place drop cloths on the floor
Cover the bathroom fixtures and the floor with drop cloths. To protect the floor, tuck or tape the drop cloth's edges against the baseboard.

image sourced from here
For the floor, canvas drop cloths work best; however, plastic sheets can be taped over the tub, sink, and other fixtures.
Compared to plastic, canvas is less pliable and heavier. Additionally, it absorbs paint, reducing the possibility that you'll walk into a spill and unintentionally leave footprints around your home.
If you do not know how to choose the right drop cloth, click here.
6. Patch the holes
Use drywall compound or filler to seal any gaps or holes. Use a bright light to highlight any places on the walls and trim that require mending.

image sourced from here
After patching trouble spots with a putty knife, scrape off extra compounds to provide a smooth finish.
Patch any holes or nicks in the baseboard, chair rails, or window and door trim using wood filler. Give the drywall compound or filler six to twenty-four hours to dry (see the directions for precise drying timeframes).
Next, use 320-grit fine sandpaper to sand the surface until it is level and smooth with the surrounding surface.
Before painting the bathroom, you might also want to caulk the area around your tub again or base trim.
7. Start with the ceiling
If you're painting the ceiling, start there. When painting the ceiling, make sure to paint the areas where it meets the walls using a brush if you are asking how to paint a bathroom ceiling.

image sourced from here
Utilizing a roller attached to an extension pole, complete the task. Use a high-quality, plush roller cover for optimal results, enabling you to apply as much paint to the ceiling as quickly as possible.
After dipping the roller into the paint tray's well, roll up the tray to eliminate any leftover paint.
Roll in a continuous stroke, starting in a corner. Keep the roller moist and roll over the painted edges and your earlier strokes, leaving about a 3-inch (7.6-cm) overlap.
8. Paint the trims before painting the walls
Apply a brush paint finish to the trim before painting the walls. Baseboards and other trim should be painted with an angled brush.

image sourced from here
Instead of having to tape off the walls, which is more difficult than taping off trim, paint them first. Apply a second layer four to twenty-four hours later, depending on the sort of paint you are using.
9. Tape off the trim
If you are unsure about cutting in along the edges, tape off the trim. You don't need to tape around every edge if you have a steady, skilled hand.

image sourced from here
Painter's tape should be used at the borders where the trim meets the walls after letting it cure for a full day if you want to be extra cautious.
Tape the tile on your walls and the fixtures in your bathroom as well.
10. Prime the walls
If you are going to be painting a large area or filling up any gaps, prime the walls. You can use a self-priming paint or forego priming if your present paint is in excellent condition, you haven't done any repairs, and you aren't changing the color much.

image sourced from here
Prime, but, if your new color is bright and your bathroom is now dark. Apply primer using the same methods as top coats: brush the edges first, then use a roller to cover larger sections.
Spot-priming any places that you fixed is also necessary.
11. Use an angled brush
To paint the borders of a wall, use an angled brush. Paintbrush dipped in paint; surplus tapped off; cut approximately 1/2 in (1.3 cm) from wall edge.
Then, make sure not to paint over the wall's edge, swivel around, and bring the brush's tip to the trim.

image sourced from here
Paint the margins of one wall first, then use a roller to complete the remaining portion of the wall before going on to the next to avoid ugly lines.
In order to constantly be painting over wet paint, finish one wall at a time. Lap lines become visible when paint is applied over sticky or dry paint. If the room's trim is painted first, it will be dry when you use the roller on the remaining wall.
12. Cover large areas with a paint roller
To remove extra paint, fill a paint tray well, dip the roller, and roll it over the tray. Beginning at a corner, move the roller vertically over the wall, covering its whole height.

image sourced from here
Make sure to overlap the paint around the margins of the wall and the last roller stroke you created with each pass.
After completing the first wall, move on to the next. Apply paint to the edges with a brush and the bigger sections using a roller.
13. Let the first coat dry
As instructed, or for at least four hours, let the first application dry. Before adding another layer, give it the necessary amount of time to dry.

image sourced from here
14. Apply a second coat for best results
For the second layer of paint, use the same procedures. Apply paint with a brush to the walls' periphery before completing the job with a paint roller. To prevent painting over dried paint, only paint one wall at a time.
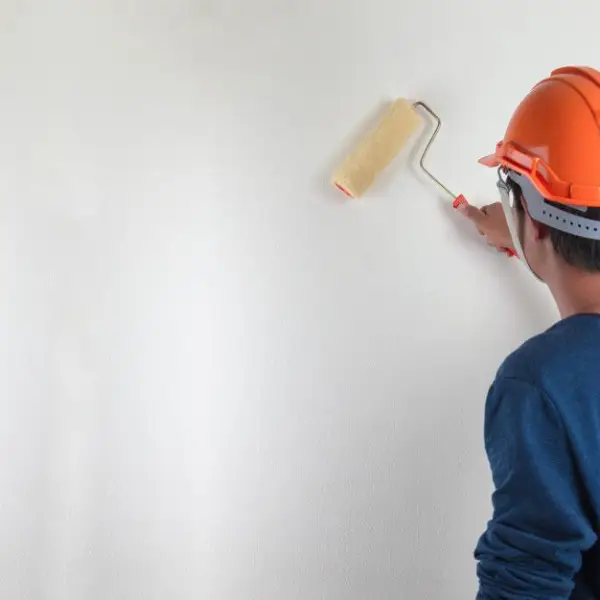
image sourced from here
15. Wait 24 hours to replace wall hangings
Once the paint has fully dried, use a utility knife to cut along the edge of the taped trim and remove the tape.
Drop cloths should be folded up and stored, bath fixture coverings should be taken off, and wall art, curtains, electrical covers, and towel racks should all be replaced.
Turn on the water supply and replace the toilet if needed. Pulling up the tape without cutting it might cause the dry paint that is attached to the wall to come off.
How to Repaint a Bathroom?
It takes many procedures to obtain a professional and long-lasting finish when repainting a bathroom. This thorough guide will assist you in repainting your bathroom:
- Take out all the fittings and extras, such as light fixtures, mirrors, and towel racks.
- Give the bathroom surfaces a thorough cleaning to get rid of all debris, filth, and any stray paint.
- Fill in any irregularities with the spackling compound and allow it to dry as directed by the manufacturer.
- Coat the ceiling and walls of the bathroom with primer.
- Pick a paint made especially for bathrooms; it should not absorb moisture or mildew.
- Put back the fixtures and extras you took out previously.
How Often Should You Repaint the Bathroom?
Another place that is utilized a lot is the bathroom. Once more, it's probable that more individuals may touch the walls—especially in a smaller bathroom or powder room
However, the biggest problem with bathrooms is moisture and humidity, which can shorten the paint's lifespan.
Most of the time, bathrooms and other high-humidity spaces like laundry rooms require repainting every three to four years.
If you need more information about how often we should repaint the bathroom, click here.
Conclusion
Because the bathroom is a damp place, the paint needs to be replaced frequently. To do that, you must strictly follow the related instructions to achieve your best results.
If you have this question in mind: how to paint a bathroom, in this article we have mentioned the step-by-step guide.


- In this post:
- Is it OK to Paint the Bathroom?
- How to Paint a Bathroom with Special Paint?
- How to Paint a Bathroom?; step by step guide
- How to Repaint a Bathroom?
- How Often Should You Repaint the Bathroom?
- Conclusion