How Do You Paint a Ceiling Like a Professional?

If you want to refresh the atmosphere in your room and brighten the ambiance, painting the ceiling is a great idea. Painting a grimed ceiling is a great way to save your room from dimming.
However, we all have heard rumors about the neck pain, messiness, and lousy results of DIY ceiling painting. These rumors get even more frightening if you are a beginner in ceiling painting. If you wonder how to paint a ceiling like a pro without a neckache and with flawless finishing, here are some useful tips for ceiling painting for beginners recommended by professionals.
How to Paint a Ceiling Quickly and Easily?
Painting a ceiling can be challenging, especially if it is your first time. Yet, following some tips can help you to paint your ceiling quickly and effortlessly. Here are the 8 steps recommended by professionals that assist you in painting a ceiling. Follow the tips to paint your ceiling without messing the room and get an immaculate result.
1. Clear the Room and Cover the Floor and Furniture
The more vacant the room is, the easier painting the ceiling will be. Start by moving the furniture to other rooms and move as much furniture as you can. Then, cover the remaining furniture with a drop cloth or plastic sheets. You may need tape to fix the covers.
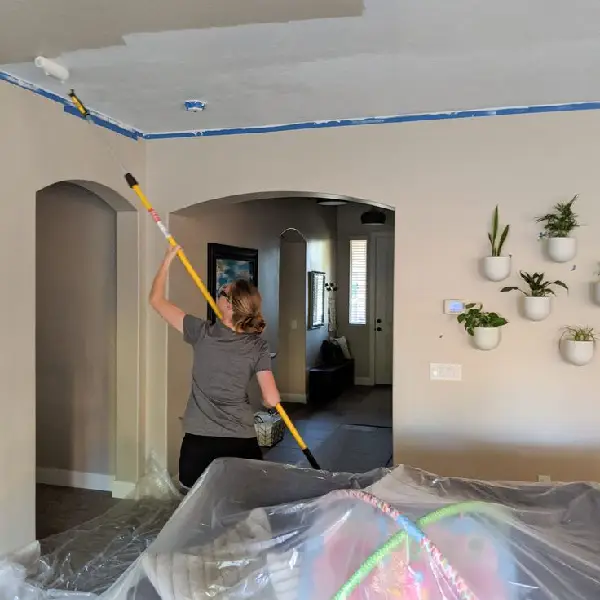
image sourced from here
Your ceiling includes lighting fixtures or other electrical devices. You must remove or cover them thoroughly with plastics and tape to save them from color drops. Finally, cover the floor with a drop cloth and fix it if necessary.
It is also essential to consider using painter's tape if you are not painting the walls and only the ceiling. Use the tape where the walls meet the ceiling and protect your walls.
Believe me, the more time you spend in this step, the easier your tasks will flow and the more content you will be at the end.
2. Choose the Right Paint and Tools
Choosing the right paint for the ceiling and preparing all the necessary tools help you save time and paint the ceiling more easily. To choose the right paint color, you can consider some tips such as:
- Ceilings that are lighter than walls look higher
- Dark color ceilings typically look lower
- White is often used for primary rooms because it is not tiring
You can find more advice on choosing a ceiling color here.
If you want to paint the ceiling with the current color, you are halfway there. You may want to refresh the decor using a new ceiling paint. In that case, some research can be helpful before making the final decision.
You must prepare the tools after providing the proper and adequate paint. Despite general belief, you need more than just a paint and roller to paint a ceiling properly. Here is a list of tools you need for painting a ceiling without splatters and straining neck:
- Ladder
- Paint Tray
- Paint Brush
- Extension Pole
- Edge Painter
- Roller
- Painting Gloves
- Rags
- Dust Musk
- Paint Strir
- Drop Cloths
- Painter Plastics
- Tape
3. Cut In Around the Edges
First, clean the ceiling with a dry cloth. You can use a mop or a cloth with an extended roller. This removes the probable dust on the ceiling that can degrade the paintings' results.

image sourced from here
As mentioned before, if you are painting only the ceiling, it is better to use painter's tape where the walls meet the ceiling. Then, start painting the corners to cut in around the edges:
- Prepare the paint
- Fix the ladder where you want to start
- Choose a 2-inch brush and start painting the ceiling towards the ceiling inside for 2-3 inches
- Feather the strokes to easily blend them with the roller painting in the following steps
This way, you can ensure that your walls are safe and you are painting ONLY the ceiling!
4. Roll the Rest of the Ceiling
After you paint around the ceiling with a brush, start painting the ceiling with a roller. You must attach the extension pole to your roller to paint the ceiling easily.
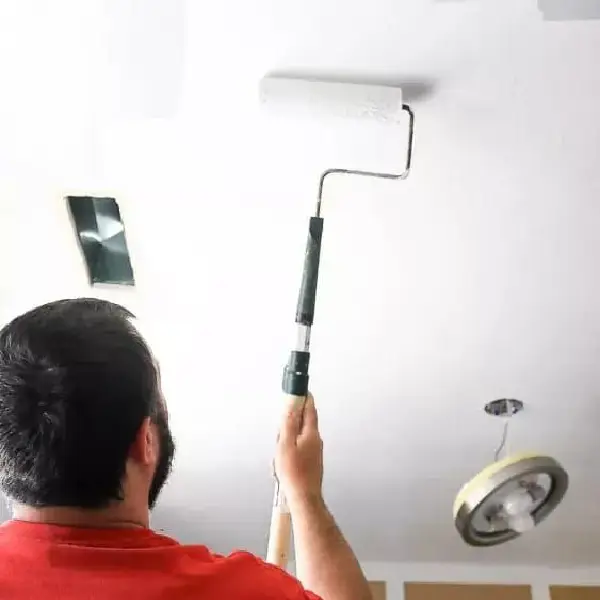
image sourced from here
Use the textured side of the painting tray to roll off the extra paint. Although you may think that more paint on the roller means a smoother painting, you need adequate paint to create a smooth, flawless-colored surface.
Using more paint than you need will only cause more splatters and droppings and make a mess.
5. Apply a Second Coat if Needed
Wait for the first coat you applied to dry thoroughly, as recommended on the paint can. Then, if the outcome is lighter than expected, repeat the painting process from the points where you cut in. Depending on the color and the coverage, you might need to apply more coats to get your desired outcome. It is necessary to wait for the previous coat to completely dry before applying the other layer of color.
6. Clean Up and Inspect the Result
Inspect the ceiling for flaws, and if needed, correct the painting with a small brush or a slightly dipped roller. Once you have reached your desired outcome, you'd better start cleaning up your tools and the room.
Cleaning up after painting a ceiling might include more tasks than cleaning up after painting the walls since it creates more splatters and drops. To clean up everything:
- Rinse Your Rollers and Brushes
- Clean your tools with warm and soapy water (a painter's comb can help to squeeze any extra paint)
- Wipe and clean the splatters on ceiling fixtures
- Wipe and clean the splatters on the ladder
- Remove the drop cloth and plastics from the furniture and the floor
- Clean the probable remaining color splatters on the walls, floor, or furniture
- Keep the windows open for the next few hours to freshen the air
If you spend adequate time preparing the first step, you will minimize the tasks here.
7. Add Some Finishing Touches
Now it is time to make the ambiance more brighter. You can now reattach the lighting you had removed before starting the painting or add some new lights to level up the radiance in the room.
Generally, refreshing a ceiling's paint results in a brighter room. Adding some extra lights or even cleaning the current ones will also add to the brightness of your room.
8. Hire a Professional If Needed
If you still wonder about the easiest way to paint a ceiling without straining the neck, I must admit it is calling the professionals!
Although painting a ceiling can be a DIY task by following these tips, the most secure option for painting a ceiling flawlessly and without getting a neckache is hiring a professional to do the task for you. Hiring a professional to paint a ceiling benefits you in the following ways:
- It saves you notable time
- Guarantees a smooth and flawless outcome
- Guarantees clean room and furniture after painting
- It doesn't cause any neck pains for you!
- It gives you extra experienced eyes to choose the color
- It saves you money since you don't need to buy tools
- Guarantees you get the desired results on the first try
In some cases, such as painting significantly high ceilings or expansive ceilings, hiring a professional is not an option but a must. Because in such cases, you will need extra and professional tools to paint the ceiling perfectly. Moreover, if the surface you want to paint is broad, you might need to hire a team of painters to see the results on time.
Moreover, if you have neck pain or other health conditions that may worsen by painting a ceiling, you need to forget about DIYing painting a ceiling and assign this task to pros. Overall, trusting skilled painters' experience and expertise is worth it!
Conclusion
A ceiling's color can affect the room more than you think. Painting the ceiling with a different color or refreshing its current color can significantly change your room's atmosphere. Moreover, you can add architectural points by making illusions by choosing the correct color shades.
Painting a ceiling is more challenging than painting walls, especially if you have issues with your neck! Yet, it should not be ignored. Following some steps, such as preparing the correct color, covering the furniture, and using the right colors, can help even the most beginner painters experience an easy ceiling painting.
Ultimately, hiring a professional is the best way to have a perfectly painted ceiling that looks as smooth as glass without straining the neck, messing up the room, and searching and buying the tools.


- In this post:
- How to Paint a Ceiling Quickly and Easily?
- Conclusion