Why Is Prep Important Before Painting?

Why is prep important before painting? Surface preparation is essential for paint adherence and has an impact on the longevity and robustness of your paint job.
The first step in the procedure is to clean the surface to get rid of any debris, dust, or oil that might prevent the new coating from sticking. To create a smooth base, any existing paint should be evaluated and, if required, scraped or sanded.
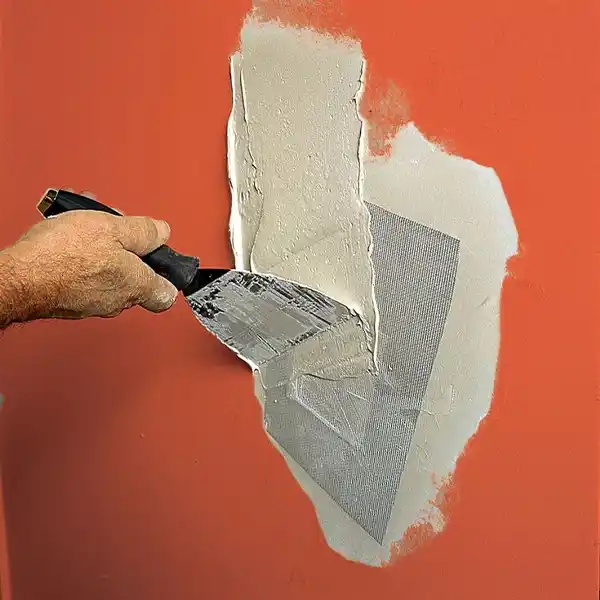
image sourced from here
A strong physical link between the paint and the surface is formed by this thorough prepping, which promotes good paint adherence and a long-lasting finish that is resistant to peeling, cracking, and other common paint problems.
In fact, meticulous surface preparation for painting is the key to a long-lasting paint job.
The Pre-Painting Phase
Before you start surface preparation, you must check out the wall for any cracks, peeling, etc., so you understand why surface preparation for painting is so important.
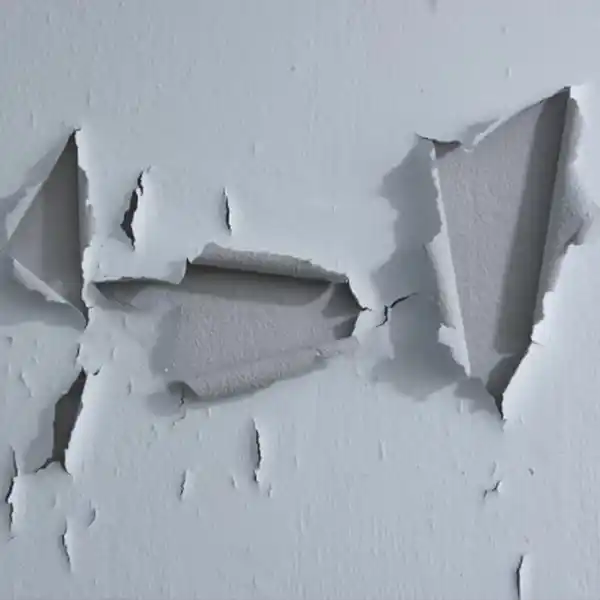
image sourced from here
It's important to look for cracks or other defects on the surface before you paint. This is crucial if you're painting over the already-finished paint job. To assist you in checking for cracks before painting, follow these steps:
- Give the area a thorough cleaning
- Make use of a flashlight
- Search for tiny fissures
- Look for more substantial fractures
- Make use of a lens magnifier
- Touch the surface
- Examine the fractures
- Highlight the fissures or peelings
In case you notice peeling of the wall, follow these steps:
- Take off the paint that is peeling
- Patch up any cracks or holes
- Use surface sanding
- Scrub the outside
- Prepare the wall
- Go ahead and paint
On the other hand, you might see cracks in the wall. Small cracks in plaster on interior walls and ceilings are common; they can result from drying out in newly constructed homes or from movement of the structure in older ones.
To fill in hairline cracks, use a scraper to slightly widen them; fillers are not effective in these areas. Then, dust the area and fill it with an appropriate product, like Polycell Trade Interior filler.
Use water to moisten the hole or crack; this will promote the filler's bonding. After letting the filler completely dry, dust the surface and give it a nice, clean surface for decoration.
Spot prime (only if the finish is matt) the afflicted area with a thinned application of your finish to achieve even porosity.
For more information about removing the peeling, click here.
Surface Cleaning and Repair
Surface preparation gets rid of imperfections such as stains, filth, and other impurities that might harm the final product. It is also possible to erase fading or flaking old paint.
Prior to painting, surface cleaning is essential since it guarantees that the paint will adhere correctly and provide a smooth, durable finish.
Of course, there are different cleaning methods for each surface, such as wood, walls, and metal.
Follow these steps for cleaning wood:
- After sanding, give every surface a thorough brush down and vacuum to get rid of any dust, debris, and grime.
- To clean the wood, liberally apply sugar soap to all of the wooden surfaces you intend to paint, either with a sponge or a sugar soap wipe.
- After cleaning the surfaces, use warm water to rinse away the sugar soap.
For a thorough guide about what preparation is needed before painting and cleaning wooden surfaces, click here.
Follow these steps for cleaning the wall:
- Vacuum the wall.
- Clean the wall: Use a sponge or soft cloth to wash the wall in tiny portions after combining warm water and a light detergent.
- Eliminate stains: Use an appropriate cleaning solution for any stains that may be present on the wall. Use a degreaser on grease spots.
- Rinse the wall once more: To get rid of any remaining cleaning solution, give the wall a thorough rinse with clean water.
- Let the wall dry fully: Before painting, let the wall entirely dry. This might take all night or several hours.
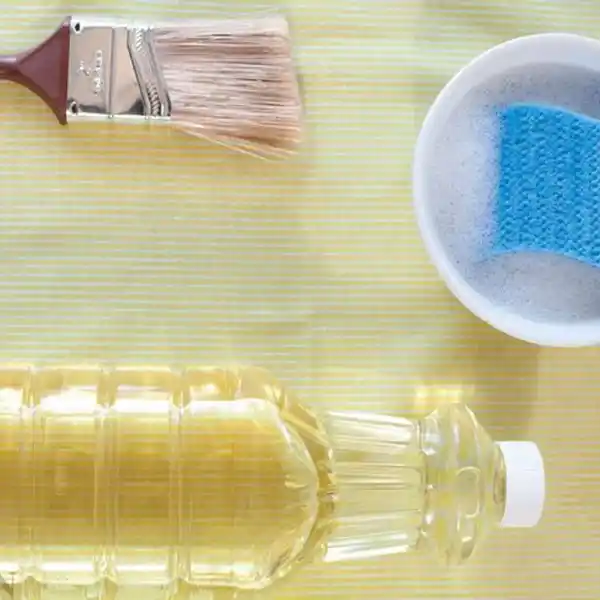
image sourced from here
For cleaning metal surfaces, pay attention to these steps:
Acetone is a better option for cleaning metal than water. There won't be any delays in your job because this dries quite rapidly. Use a rust remover to first clean any rust that you find on the metal.
Don't contact the metal surface again after wiping it down with acetone using a fresh rag.
Your cleaning efforts might be quickly undone by adding grease or oil from your fingertips to the material. Use a scuffing pad along the surface you intend to paint to complete the procedure.
For more information about why it is important to prep before painting the metal surfaces, refer here.
Sanding and Smoothing Surfaces
Another reason we can mention as the answer to why is surface preparation for painting so important is that sanding gives you an even base for painting.

image sourced from here
Sanding is a crucial step in the painting process because it helps create small, rough ridges that the paint will adhere to, which add adhesion and help remove imperfections, also referred to as pimples. Sanding also helps prepare the surface for painting application.
Here is a comprehensive guide for sanding different materials:
Wood
- To start, use 80–100 grit coarse-grit sandpaper to remove any old paint or rough areas.
- To smooth the surface, gradually go to finer grits (between 120 and 150 grit).
- Use 220-grit sandpaper for the final sanding to get a smooth finish.
Metal
- To start, use 80–100 grit coarse-grit sandpaper to get rid of old paint, grime, and corrosion.
- To further polish the surface, use sandpaper with a medium grit (120–150).
- For a polished appearance, use fine-grit sandpaper (220–240 grit).
Plastic
- To start, use sandpaper with medium grit (150–180) to get rid of any defects.
- To polish the surface, use sandpaper with a fine grain of 220 to 240.
- Use a wet sanding technique with fine-grit sandpaper and water for a glossy finish.
Drywall
- To start, use 80–100 grit coarse-grit sandpaper to smooth off any lumps or flaws.
- To further polish the surface, use sandpaper with a medium grit (120–150).
- Sandpaper of fine grit (220–240 grit) should be used to get a smooth, paintable surface.
Priming as a Crucial Step
In order to get a smooth, uniform, and durable finish, primer is a crucial stage in the painting process.
It serves as a foundation coat to improve the paint's adherence and durability by priming the wall. The following are the main justifications for priming walls before painting them:
- Enhanced Stickiness
- Increased Sturdiness
- Uniform Color
- Improved Reporting
- Diminished Absorption of Paint
- Enhanced Finish
Oil-based Primer
For many years, oil-based paints and primers have been considered industry standards. These primers are very adaptable and suitable for a broad range of surfaces since they may be used with both oil and latex paints.
Oil-based primers work best on surfaces that are already painted, such as interior and exterior walls, steel, other metals, and wood, whether painted or unpainted.
Latex-based Primer
Water-based latex primers are perfect for painting unpainted drywall. Compared to oil-based primers, they are less brittle, more flexible, and dry quickly, which reduces the likelihood of peeling and cracking.
Additionally, they work well for priming galvanized metal, masonry, concrete, and softwoods like pine.
Shellac Primer
For millennia, people have sealed wood and other materials using shellac. Shellac-based primers are good for interior paint projects and are perhaps the greatest stain-blocking primers.
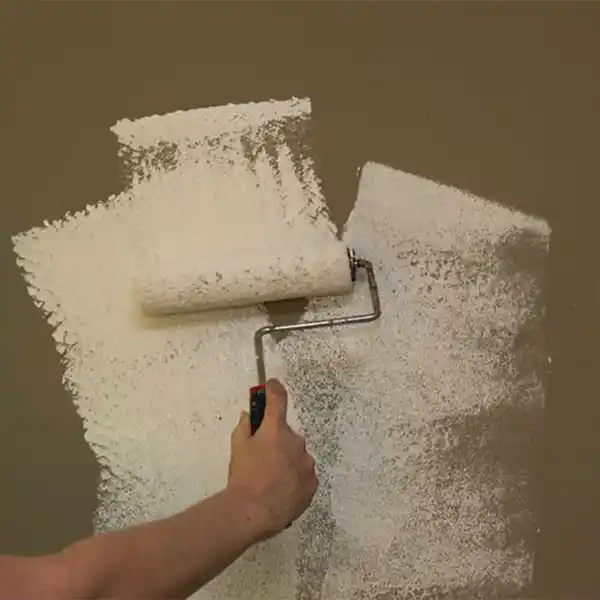
image sourced from here
They even seal in the odors of smoke-damaged latex paints and perform well on severe water and smoke damage to walls and surfaces.
Sealants and Undercoats
A compound called sealant is applied to gaps or crevices between two surfaces to stop the flow of water, air, or other materials. Sealant is usually used prior to painting in order to fill in any holes or fissures in the surface that will be painted.
This makes it more likely that the paint will attach correctly and that the paint film won't have any gaps or breaks in it.
Sealants should be used before painting for a number of reasons. To start, sealant keeps paint from cracking or flaking.
This is so that paint cannot penetrate the surface and establish a solid connection because sealant forms a barrier between the paint and the surface.
Here are the different types of sealants and their case of use:
- Water-based sealants made of acrylic latex are simple to apply and maintain. For interior applications, such as sealing around windows and doors, they are perfect.
- Silicone sealants are multipurpose sealants that work well on glass, metal, and plastic surfaces. They can tolerate hot conditions and are resistant to weather.
- Polyurethane sealants are robust and long-lasting sealants that are frequently utilized in building applications. They can withstand solvents and chemicals.
- Gaps between metal surfaces are frequently sealed using butyl rubber sealants, which are gummy, sticky sealants. They can tolerate hot conditions and are resistant to weather.
Importance of Dust and Debris Removal
One cannot emphasize how important it is to clear away dust and dirt before painting. A smooth, clean surface is necessary to have a paint job that looks professional and lasts a long time. This is the reason why:
- Adhesion: Debris and dust can obstruct the paint's ability to adhere properly to the surface by acting as barriers. Over time, this may cause the paint to flake, peel, and chip.
- Smooth appearance: The uneven surface that dust particles can produce gives a rough, textured appearance. Eliminating dust guarantees a consistent and flawless coat application.
- Color Accuracy: Debris and dust can change the color of paint, giving it a washed-out or discolored appearance. The actual hue of the paint may be seen on a clean surface.
Here are some tips for efficient dust and debris removal:
- Dry Cleaning: To get rid of cobwebs and loose dust, use a vacuum cleaner attachment with a soft brush.
- Moist Cleaning: Use a moist cloth or sponge to wipe away any lingering dust or grime. Ensure that the fabric is not excessively damp in order to prevent watermarks.
- Sanding: To smooth out uneven surfaces or regions with a lot of trash, sand the surface lightly. Sand using fine-grit paper, following the direction of the grain.
- Tack Cloth: Lastly, use a tack cloth to wipe away any last bits of dust. A fabric that has been specifically prepared to draw and retain dust without leaving any trace is called a tack cloth.
Real-life Examples of the Consequences of Inadequate Surface Preparation
In the last part of the article: why is prep important before painting, we are going to show you some real-life examples of inadequate surface preparation.
Before that, let’s see what happens in case we do not take prep word seriously.
- Failure of Adhesion/Delamination. When the coating or paint separates from the underlying substrate.
- Bubble-like patches in this instance, are those brought on by moisture entrapment and soluble salts. See our article here for further details.
- Surface contamination is typically caused by silicones, oils, greases, or moisture.
- Remove paint flakes from the surface. Inadequate pre-treatment of non-ferrous, stainless, or previously galvanized surfaces may be the source of this.
In the end, the paint system ought to be removed and appropriate surface preparation methods used if the surface displays any of the aforementioned characteristics.
Here are some real-life pictures that show the result of inadequate prep work:
- Adhesion failure, because of rushing the drying part of the painting.
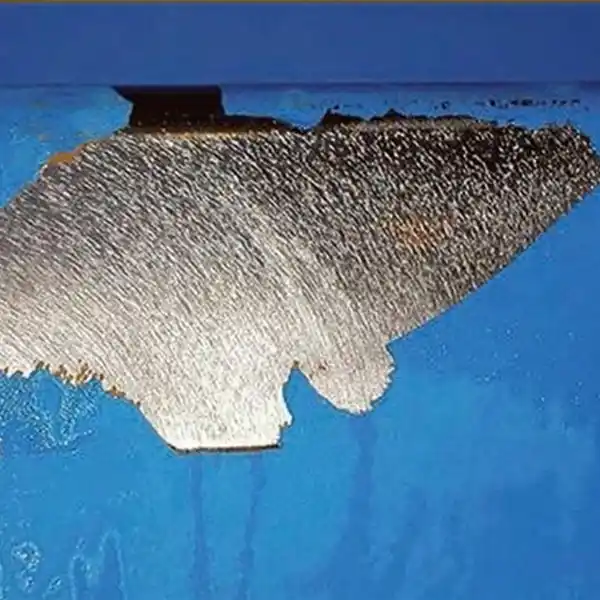
image sourced from here
- Alligatoring, because the dust and debris was not totally removed from the surface before painting.
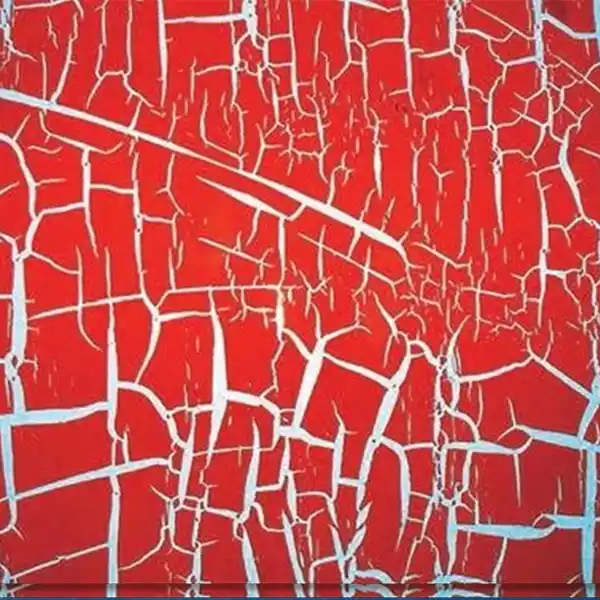
image sourced from here
There are also two examples of a well-prepared wall after for painting:
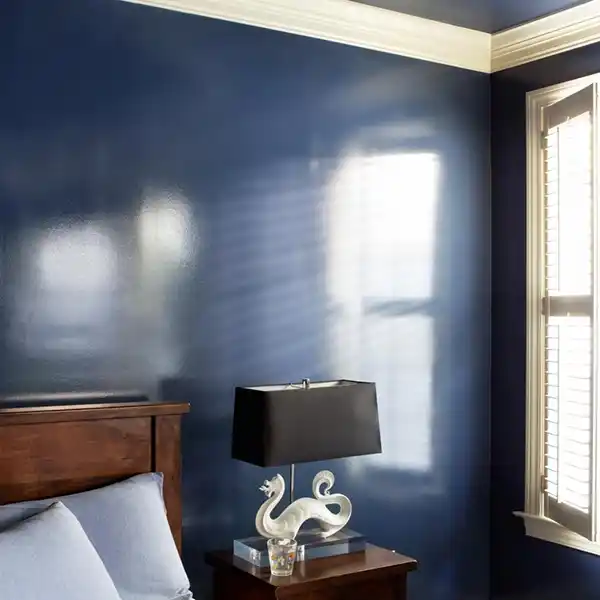
image sourced from here
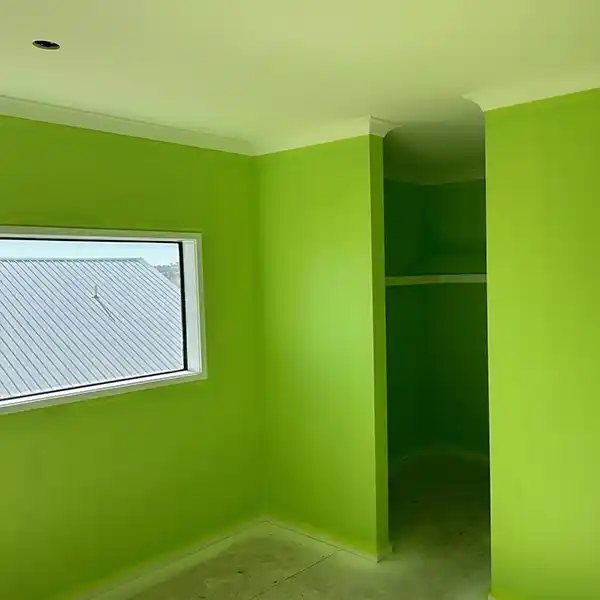
image sourced from here
Conclusion
A well-prepared wall for painting is an important factor in achieving the best result after painting is over.
There are many common mistakes people make, such as rushing the painting process, not letting the painting dry, or not using primer and each one causes serious problems.
Spending time and energy on surface preparation will pay off in terms of the paint job's overall quality and durability.


- In this post:
- The Pre-Painting Phase
- Surface Cleaning and Repair
- Sanding and Smoothing Surfaces
- Priming as a Crucial Step
- Sealants and Undercoats
- Importance of Dust and Debris Removal
- Real-life Examples of the Consequences of Inadequate Surface Preparation
- Conclusion