Yearly Inspection: Is it necessary?

When was the last time you had a professional yearly home inspection done on your house?
If you said the first time you bought your house, you could be making an expensive error.
An annual home inspection gives homeowners the chance to learn more about the inner workings of their house and identify any problems before they become serious ones, just like yearly health examinations do.
Given that, below we have made a complete checklist of annual home inspections that will help you through the process.
Before that, let’s see what a yearly home inspection is and why should you do it at all.
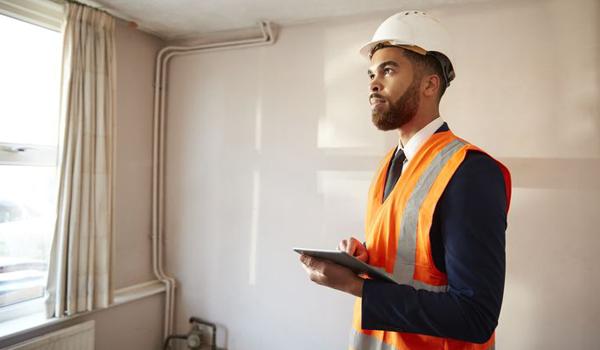
What is a Yearly Home Inspection?
An extensive, non-invasive assessment of a house's condition is conducted annually during a home inspection.
It assists homeowners in recognizing any emerging concerns or upkeep requirements before they turn into significant issues.
The value of the house may be preserved, and the resident's safety and well-being can be guaranteed, with annual inspections.
Frequent yearly home inspections may offer important insights, such as spotting any issues early, preserving the value of the property, and guaranteeing that all of the systems in the house are operating well.
This enables homeowners to take proactive measures to resolve problems and save future, more expensive repairs.
A house inspection in a year, is comparable to a routine auto or air conditioning service.
It enables homeowners to keep up with required maintenance and identify any problems before they get worse. This helps to retain the home's worth over time in addition to preserving its condition.
Why is Annual Home Inspection Important?
Here is why an annual home inspection is necessary:
Small problems might grow into big ones
A yearly home inspection provides you with the knowledge you need to keep minor issues from growing into major ones that may require expensive repairs.
Before you do, a qualified house inspector can see the warning indications of wood-destroying insects.
There are many sections of your house you never see
More of your home is viewed by a certified professional home inspector than by you will ever be.
Even if you did, you most likely have no idea what to search for. Hiring a qualified home inspector to provide a comprehensive assessment of your house is well worth the expense of the inspection.
It ensures your safety
A certified home inspector can guarantee that your house is as secure as possible. He'll investigate electrical systems for potential problems.
He will check the stability of your patios, porches, and stairs. He will advise you on what to do to prevent potentially fatal events such as carbon monoxide poisoning, fire, or physical harm.
You'll receive excellent financial advice
You will be equipped with the necessary knowledge to address any leaks in your windows or doors.
You will know what to do if cleaning is necessary for your A/C system to function at its best.
It allows homeowners to plan ahead for repairs
Even though some homeowners might not be aware of how old every device in their house is, a hot water heater that is ten years old could need to be changed before you run out of time.
A competent inspector can provide homeowners with an idea of how long important appliances will last and when each one will need to be replaced.
Over time, it saves homeowners money
It is far less expensive to fix an old, leaky pipe than to fix a burst pipe and the ensuing water damage.
A home inspection report may help you identify areas in your house that could require repair and can also help you prevent issues brought on by neglected upkeep.
It facilitates the process of selling your house when the time comes
If significant issues are discovered, it's likely that the purchasers would request a reduction in price or perhaps leave.
Sellers may approach the process with confidence knowing their house is in excellent condition and can offer their property for top value by keeping up with home inspections.
Yearly DIY Inspection Checklist
Throughout the year, examine your house for leaks, cracks, breaks, wear, and any other potential issues you can think of.
Use this comprehensive DIY home inspection checklist as a reference. Create a repair list after that so you can stay on top of upkeep in the upcoming months.
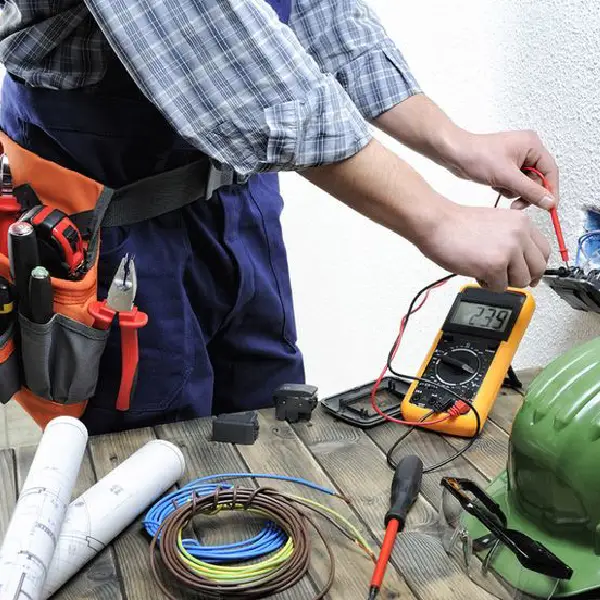
Electrical
The first thing you should examine in an annual home inspection checklist is the electrical item:
- Make sure no nearby trees are endangering any electrical lines by inspecting them.
- Examine the panel for any fresh burn scars around the fuses or breakers. Additionally, look for burn marks on outlets as these might indicate loose or sparking wires.
- Look for any loose boxes, outlets, or receptacles that might need to be refastened to the studs while the power is off.
- Plugging in a lamp and pressing the test and reset buttons will test each GFCI outlet to determine if it turns the light on and off and back on again.
- Make that every outlet functions by using an electrical tester or a light across the area.
Exterior
The next one is the exterior inspection:
- Inspect driveways, sidewalks, and pathways for any signs of fractured concrete or asphalt.
- Ensure there are no loose or bulging sections in the retaining walls. A single, intense downpour of rain or snow might trigger a mudslide.
- Check for broken stairs, loose rails or boards, and drooping ceilings on porches and decks.
- Examine fences, stone walls, and their gates for any loose or drooping sections that may fall or blow off during a storm.
- Look for stains on the siding as they may indicate a leak in the roof or a water issue.
- Inspect the attic vents, eaves, and soffits for indications of bug or bird nests.
- Make a note of any areas on the siding of the home where paint is flaking, brick-and-mortar is missing, or stucco is breaking.
- Seek out any leaning against the chimney. Verify that the flashing is intact and not missing or peeling.
- Inspect gutters and downspouts for blockages or uneven slopes, particularly in the event of precipitation.
- Examine the foundation for cracks and bulges.
- Take a look at the sill, looking for decay and insects. Look for elevated mud channels, which indicate the presence of termites.
- Ensure that the ground's grade surrounding the foundation slopes away from the house.
- Examine the roof. Are there missing shingles, fractures, or collapsing sections? Examine wood for rot and cracks, slate and tile for broken pieces, holes in flat roofs, scorching, curling, or dried shingles on asphalt.
- Check for any broken or missing pieces on the vent/chimney caps and flashing. Seek out any rust.
- Examine the roof for moss and other detritus.
Click for more information about the electrical part of inspection.
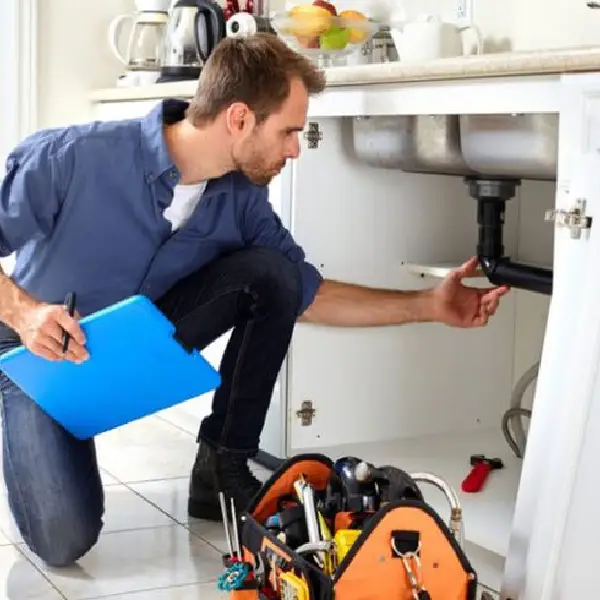
Plumbing, including bathrooms and laundry
After inspecting the exterior in a yearly home inspection, it is time to examine the plumbing:
- Inspect any exposed pipes for indications of leakage, as well as any locations where pipes pass through the foundation or walls.
- Keep an eye out for any corrosion, since this might point to a problem with the water supply or the pipe itself.
- Verify the water's pressure. Low pressure may indicate a blockage in the showerhead or faucet aerator, or it may indicate an issue with the line.
- Examine the drainage speed of your drains; a sluggish drain may be the result of a blockage or a clogged vent pipe. Seek out a full, swirling drain; bubbling drains indicate an issue.
- Make sure the toilets are working correctly by giving them a flush. Check for damaged or missing parts by opening their tanks.
- Check for rust flakes within the water heater's burner chamber. Examine the flame; it ought to be uniformly blue and devoid of yellow.
- To get rid of silt that has accumulated at the bottom, drain the water heater.
- Keep an eye out for chipped tiles around sinks and in the shower area. In order to identify any loose or hollow tiles that could be hiding rotten backer board behind them, tap on the tiles.
- Examine the caulking in the shower and bathtub to see whether it needs to be replaced.
- Look for mildew where water may remain over extended periods of time.
- Adjust the toilet base to ensure that there is no rocking since this might indicate that the surrounding floor has been harmed by a leak.
- Check for cracks in sinks, toilet bowls, and tanks.
- After turning on the bath and shower faucets, look for leaks near the knobs and valves.
- Take off the showerhead's screws and inspect it for any accumulated silt that could be reducing the water pressure.
- Check vent fans for dust or blockages. Turn them on: If there is a lot of noise, there could be a worn-out bearing or a jammed flapper.
- Inspect washer hoses for leaks or indications of deterioration, such as fractures or brittleness.
Septic and water
- To get a sample of your well water tested for contaminants and microorganisms, send it to your national cooperative extension.
- Verify that the well lid is securely shut, but that the pump can still be accessed.
- If the sump pump activates on its own, test it by submerging it in water.
- If you see any damp patches of ground or unusually lush vegetation surrounding your septic tank or field, it may indicate that the tank is full or failing.
Warming
- Examine the furnace flue with a flashlight to check for any corrosion or soot accumulation.
- Dishwashing soap and water may be used to create a solution that you can brush on ductwork joints.
- Look for missing or loose screws and covers on registers and vents.
- Look for any leaks or broken flooring near radiators, since these might indicate a leak or an improper pitch toward the return.
- Keep an eye out for loose parts, corrosion, general system degradation, and other indicators of a deteriorating system.
Interior
Now it’s the interior’s turn:
- Check for loose doorknobs and hinges.
- Look for signs of joint problems, such as snap nails, loose boards, loose tiles, and bouncy patches, on the floor.
- Check the ceilings for any stains that could point to a plumbing or roof leak.
- Verify that there are no new cracks or sagging in the flooring or ceilings since these might indicate a larger issue causing the home to move.
- Look for fresh fractures in the plaster or ruptured screws and nails in the drywall.
- Examine the fireplace and chimney with a flashlight, looking for any loose bricks, cracks, evidence of animal nested areas, or an abundance of soot that may cause a chimney fire.
- Verify that the damper is functioning correctly.
- Make sure all of the ceiling fans are firmly fastened to the ceiling and haven't come free from all the summer use by looking around.
- To inspect the stability of the stair balustrade, jiggle it and look for any loose balusters or banisters.
- If any smoke or CO detectors don't function, test them all and change the batteries right away.
Doors and windows
- Check for rips and wear on the weather-stripping surrounding external doors and windows.
- Examine the glass and glazing surrounding the windows for any fractures.
- Look for any sticking areas in the way the windows operate.
- On window frames and chairs, look for wear indicators like flaking paint, which is typically seen in the bottom corners.
- Examine thresholds for any gaps that would allow water to seep into the sill.
Attic
- When the lights are out during the day, have a look around the attic area. Look for light-leaking holes in the roofing.
- Watch for indications of animal activity or potential animal entrance locations.

- Look for any gaps surrounding vents. Check the fan motors for any loose screws or frayed wire.
- Check the insulation for any possible leaky areas by feeling around for moist patches.
- Inspect rafters and joists for any damage to the structure.
- Examine the garage door's operation and check for any cracks or dents in the door's track.
- Ensure that there are no trip or fall hazards caused by tool storage or hanging rakes and shovels.
Kitchen
- Check the sink's drainage system and the faucet for leaks.
- Check that all of the drawers and cabinet doors open and close correctly.
- After turning on the disposer, listen for any indications of blockages or motor issues.
- Verify that each stove burner ignites rapidly, correctly, and without sparks or sudden flashes of flame. Verify if gas stoves provide a consistent blue flame.
- Look for evidence of wear and tear on the oven door gasket.
- Make sure a gas broiler lights correctly before turning it on.
FAQs
How much does an annual inspection cost?
In Canada, the cost of a home inspection can range from $250 to $700.
How long does an yearly home inspection take in Canada?
A yearly home inspection in Canada usually takes two and a half to three hours.
Can I do the annual home inspection by myself?
Although you may do your own yearly home inspection, hiring a professional home inspector is usually advised to guarantee a complete and accurate review.
Conclusion
A yearly home inspection is a necessary job to do, however, some people neglect it and they will face the consequences afterward.
If you do not want this to happen to you and your family, this article is for you.
We first explored the reasons you should do the annual home inspection, then mentioned all the steps and checklists included in.
All images sourced from here.


- In this post:
- What is a Yearly Home Inspection?
- Why is Annual Home Inspection Important?
- Yearly DIY Inspection Checklist
- FAQs
- Conclusion